
Understanding the timeline of a comprehensive basement waterproofing project allows homeowners to plan their schedules and protect their properties without unnecessary stress. Because a wet basement can lead to mold, structural decay, and ruined personal belongings, knowing when your home will return to normal is essential.
Every home presents unique challenges, meaning the duration of a waterproofing job depends heavily on your specific foundation type and the scope of work required. By familiarizing yourself with the typical project phases, you can set realistic expectations and ensure a smooth, successful home improvement experience.
Initial Site Preparation and Clearing
Before any physical waterproofing can begin, technicians must prepare the workspace to ensure safety and efficiency. This initial phase involves protecting your home’s interior and setting up the necessary heavy equipment.
- Moving personal belongings, storage boxes, and utilities away from the perimeter walls to provide unobstructed access.
- Laying down heavy-duty plastic sheeting and floor runners to protect your carpets and hardwood from dust and debris.
- Setting up specialized ventilation systems to control airborne dust and exhaust fumes during the excavation process.
A well-prepared workspace prevents accidental property damage and speeds up the overall delivery of the project.
Interior Drainage Trench Excavation
For interior waterproofing systems, crews must jackhammer the concrete floor slab along the perimeter of your basement. This is often the loudest and most labor-intensive portion of the entire installation process.
- Breaking through the existing concrete floor slab to create a trench that is deep enough to house the drainage pipes.
- Excavating the dirt and gravel beneath the slab to establish a downward slope toward the sump pump location.
- Transporting buckets of heavy concrete debris and soil out of the basement to be loaded into disposal trucks.
Completing this heavy excavation work typically takes a full day or two, depending on the thickness of your concrete floor.
Drainage System and Sump Pump Installation
Once the trench is excavated, the team installs the specialized drainage pipe and places the high-capacity sump basin. This system acts as the heart of your interior waterproofing, collecting groundwater before it reaches your floor.
- Positioning perforated drainage pipes wrap-protected with filter fabric into the trench to prevent sediment clogging.
- Backfilling the trench with washed river stone or clean gravel to promote rapid water filtration into the pipes.
- Setting up a heavy-duty sump pump basin along with a reliable backup pump system to handle extreme storm events.
Properly lining and grading these components ensures that water is continuously routed away from your foundation footings.
Wall Vapor Barrier and Membrane Application
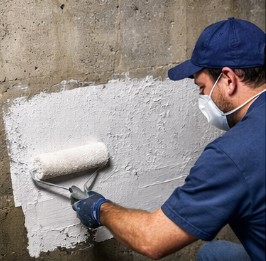
To protect your basement walls from hydrostatic pressure and dampness, technicians install thick moisture-resistant barriers. These membranes redirect any wall seepage downward directly into your newly installed sub-floor drainage system.
- Applying thick, durable vapor barriers or specialized semi-rigid plastic drainage boards directly to the masonry walls.
- Securing the top edge of the membrane with specialized fasteners and sealant to prevent moisture from slipping behind the sheet.
- Connecting the bottom edge of the wall barrier to the sub-floor drainage trench for seamless water routing.
This crucial step seals off damp masonry and helps lower the ambient relative humidity levels throughout your lower living space.
Concrete Restoration and Final Cleanup
The final phase of the project involves restoring your basement floor and restoring order to your property. Technicians pour fresh concrete over the trench to match your original basement floor level.
- Pouring and meticulously smoothing out new concrete over the gravel-filled trench to seal the system.
- Cleaning up all remaining dust, tools, and construction materials from the work areas.
- Performing a final walk-through with you to explain how the new system operates and how to maintain the sump pump.
Once the new concrete cures over the next few days, your basement is ready to be used safely once again.
Securing Your Peace of Mind Long-Term
While a full basement waterproofing project requires a temporary disruption to your daily routine, the long-term protection it provides is invaluable. Investing a few days of construction time safeguards your home from structural decay, mold growth, and decreased property value.
Taking this proactive step ensures that your basement remains dry, healthy, and usable for decades to come. Do not let the fear of a temporary construction project delay you from protecting your most valuable family asset.